Disable the checkbox to show the Subscription price suffix on the Product page. By default this is enabled to not show the subscription price suffix.
Cart page
Add your own custom HTML text by using the shortcodes: [today_subtotal], [interval], [period], [length], [payment_count], [grand_subtotal] and [sign_up_price].
Product Data Settings
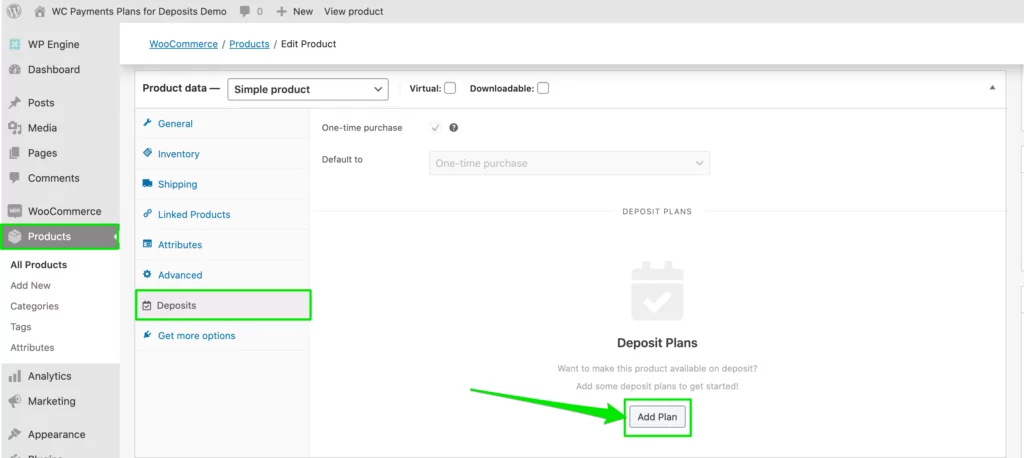
Adding a Payment Plan
Find a product on your store that you want to apply a payment plan towards. Edit the product and go down to the Deposits tab and click Add Plan.
Billing Interval, Length, Price
Next, choose the interval, length, and price of your payment plan.
Interval: Choose the interval duration. For example: days, weeks, months, years.
Length: Choose the billing plan length. For example: 1 month, 2 months, 3 months, etc.
Price (Price per installment): The price you would like to charge per installment. For example, if the product costs $100, and you have 4 equal installments, the price per installment would be $25.
For this example, I have a $100 product, and I want to charge a customer 25% up front and the remainder over 3 months (4 total payments). I choose every month for four months. There will be 4 total payments. Note, the plan would look like this:
Interval: every month
Length:4 months
Price: $25.00.
Click save.
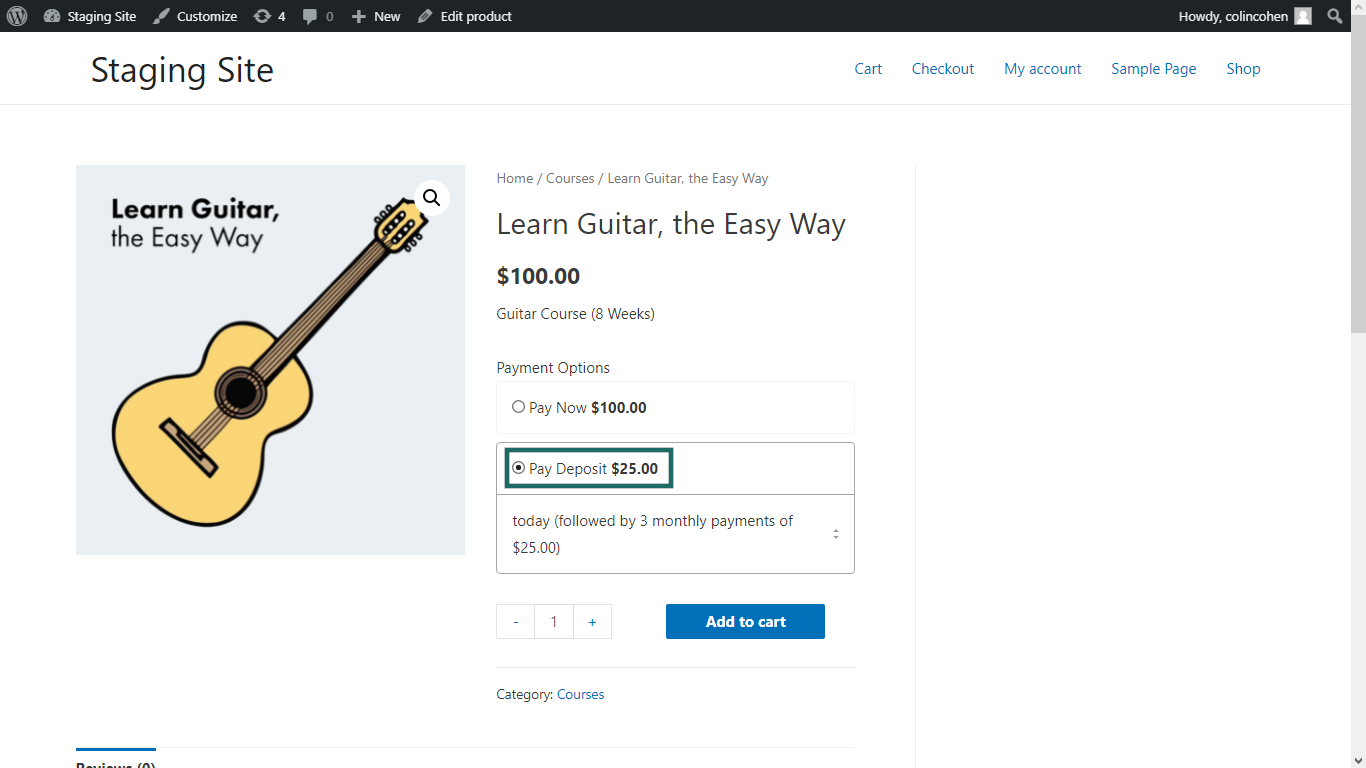
Then, open up an incognito mode, this is how your product will be displayed.
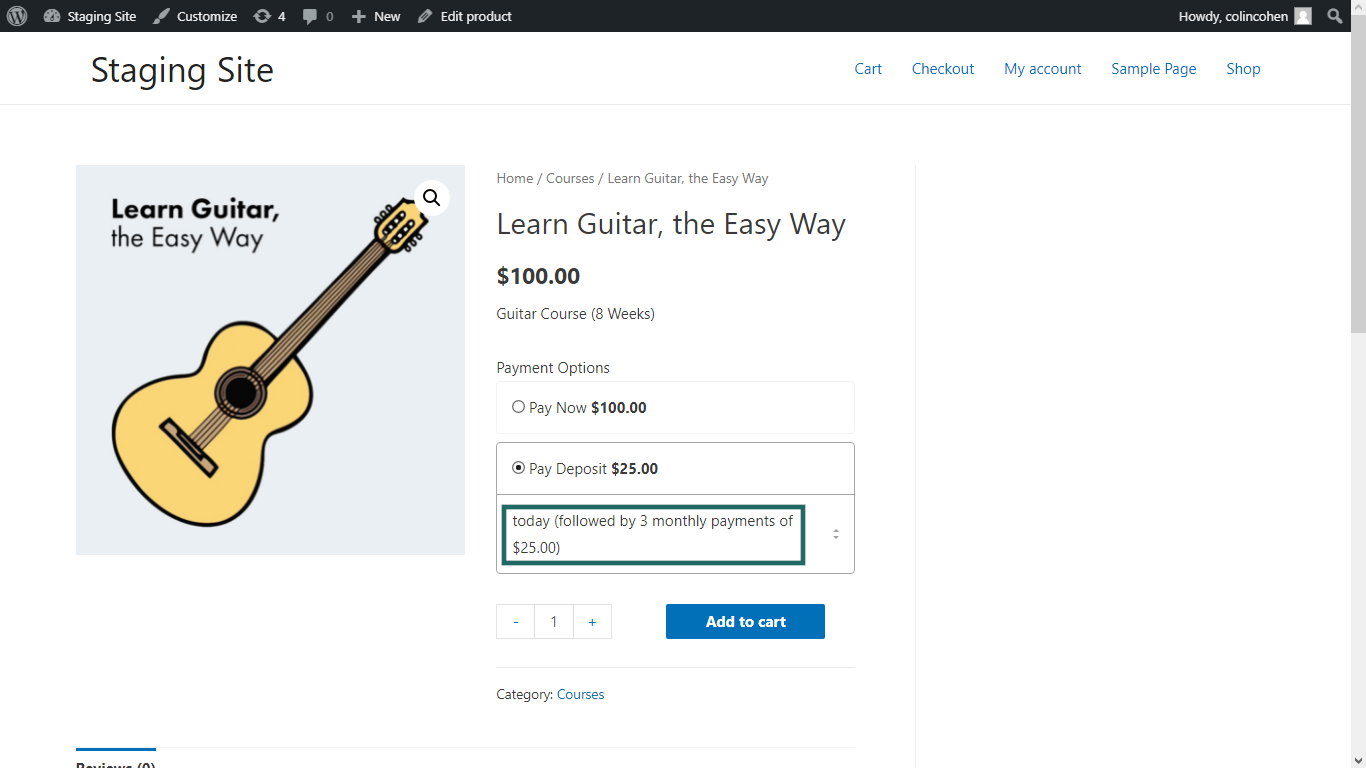
Subtext
By default, if nothing is entered into the subtext field, it will display the following on the product page: “X interest-free payments” or “4 interest-free payments”.
However, you’re able to insert your own text into the subtext field. This is usually done if your product or payment plan needs to be explained or better understood for your customer. For instance, I inserted the following text “today (followed by 3 monthly payments of $25.00)”.
Open up an incognito mode, this is how the subtext will be displayed on the product page.
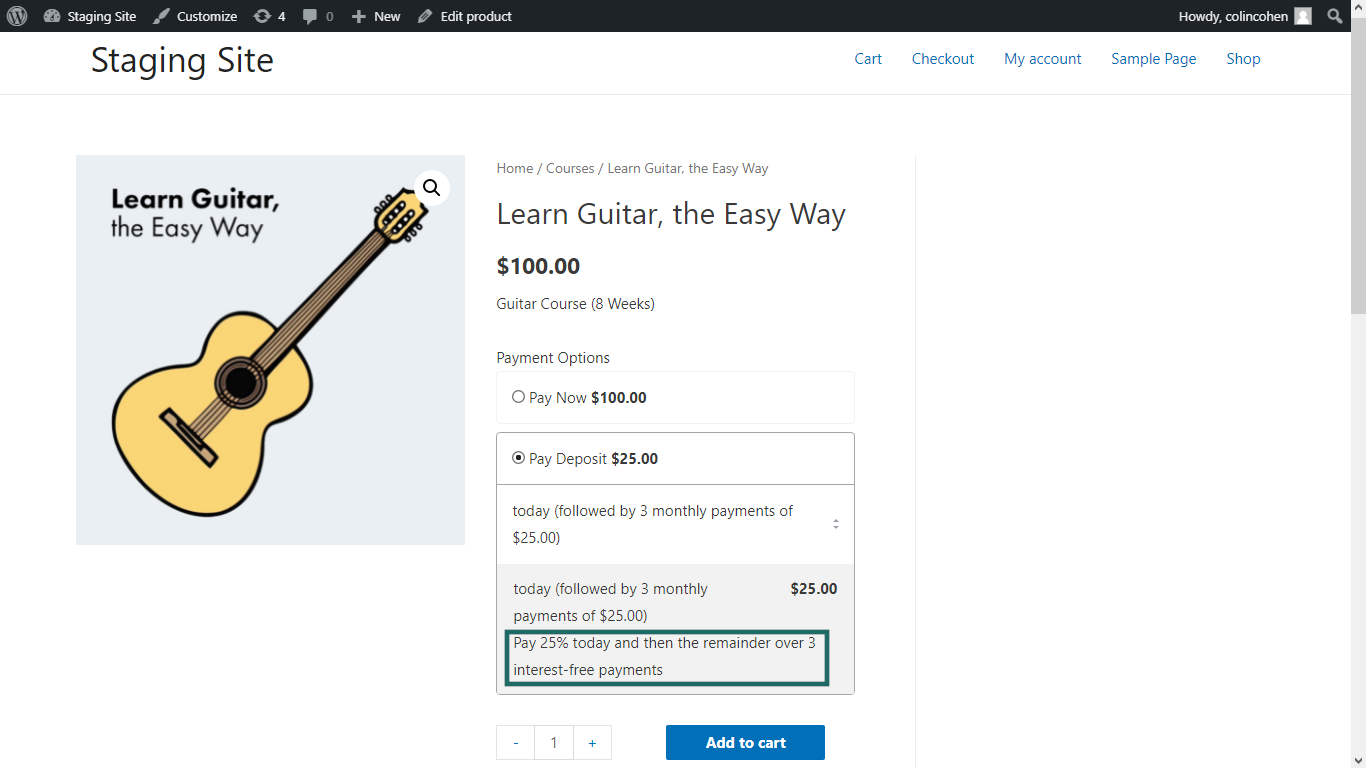
Description
By default, if nothing is entered into the description field, it will not display anything on the product page.
However, you’re able to insert your own text into the description field. This is usually done if your product or payment plan needs to be explained or better understood for your customer. For instance, I inserted the following text “Pay 25% today and then the remainder over 3 interest-free payments”.
Open up an incognito mode, this is how the description will be displayed on the product page.
One-off selling
By default, if a payment plan is added, this tick box will automatically be enabled.
If the product allows multiple payment options (Payment Plan + One-time Purchase):
If the product only allows a single payment option (Payment Plan):
Default Option
Further, if a Payment Plan option is available for a product, by default, the ‘One-time Purchase’ option will be enabled.
You can also select what option you would like to default to: One-time purchase or Payment Plan.
If the One-time purchase option is enabled:
If the payment plan option is enabled:
Cart & Checkout Settings
Once a product is placed in the Cart, the payment plan information is shown to the customer, so they can understand if the product they’re buying is full price or on a payment plan. For example, I included an example below of an order of the exact same product (Wilson D8 Irons), but one order has the payment plan option and the other order is full price.
And this is how it will look on the checkout page. Note, the following terms in the checkout totals:
Total Due Today: The amount of money owed today.
Future Payments: The remaining amount of money owed on the payment plan.
Next Payment: The date of the next installment payment (i.e September. 4, 2020 for $25.00).
Subscription Settings
To go to the General Payment Plan settings, navigate to the following: WooCommerce > Settings > Products > Payment Plans.
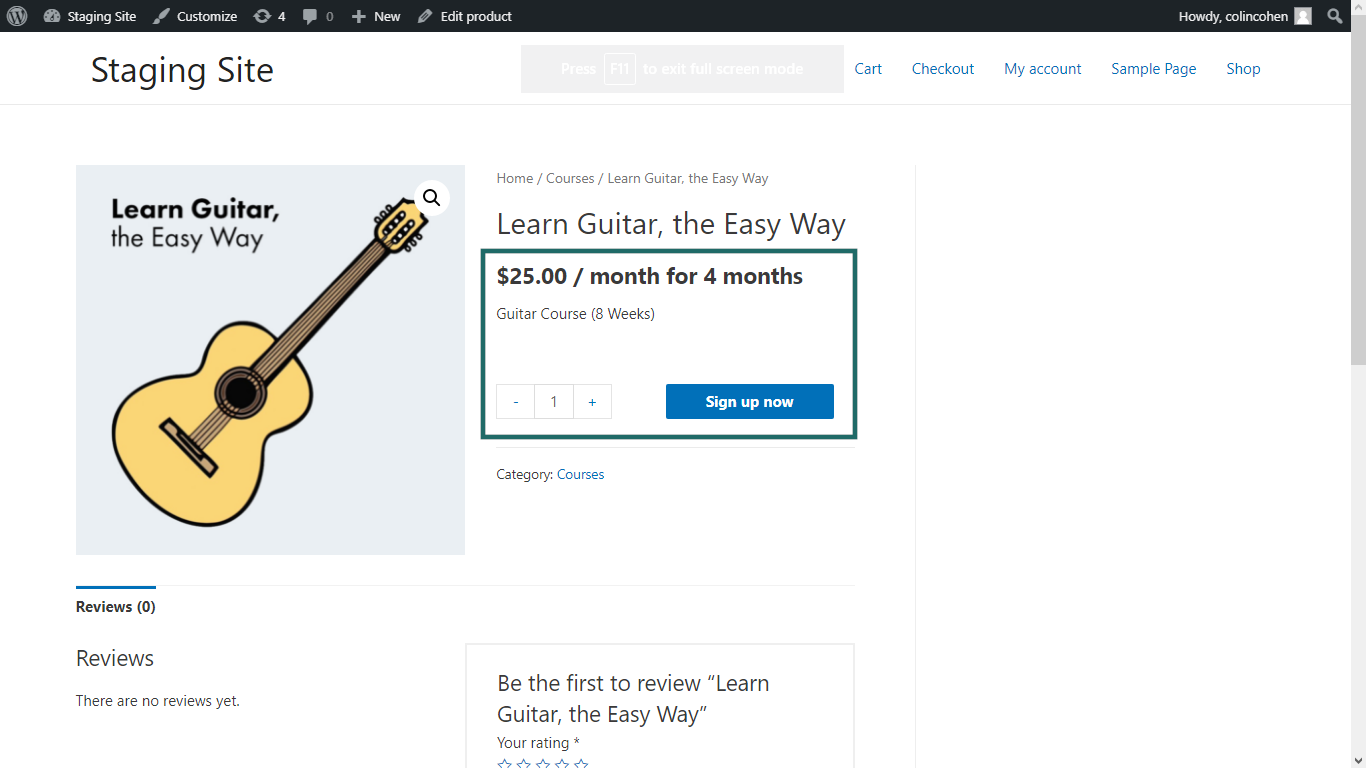
Button Text
By default, the button text label is “Sign up now”. To change the button text label, update the text to “Buy now”, and then scroll to the bottom of the page and click Save changes.